Beckhoff TwinCAT 3 Client Tutorial
The Beckhoff TwinCAT 3 offers you numerous features and various software function blocks for all automation tasks. The OPC UA client enables OPC UA communication with remote OPC UA servers like the server of the Franka Emika’s robot family FP3/FR3.
The TwinCAT software runs on a Windows system and can be tested with trial licences. The following tutorial shows how to set up the OPC UA client in TwinCAT and how to connect to the robot. For this tutorial TwinCAT can run on a Windows PC, so no industrial PC or PLC of Beckhoff is required.
Preconditions
Check the Beckhoff Download page to install TwinCAT 3, the OPC UA server, client, gateway and configuration correctly. Add the trial licences for TC1200 and TF6100. An installation and licences guide can be found in several Beckhoff tutorials.
To use the OPC UA server with TwinCAT a version of the Franka Emika sytem of 5.4.0 or greater is required. In the version 5.4.0 there are some extra limitations that will be resolved in the next release. These are described in the Current Limitations chapter.
Testing the connection to the OPC UA server (optional)
To test the connection with the Control of FP3/FR3, the Sample Client feature of TwinCAT can be used. Search for “Sample Client” in the windows search bar and
click on the application to open it. Use either opc.tcp://robot.franka.de:4840 (if connected to the base of the robot) or the IP address of the Control, for
example opc.tcp://192.168.1.34:4840 (if connected to the mastercontroller). The Port should be set to :4840. Click on Get Endpoints and select
Sign:Basic256Sha256:Binary.
Afterwards you can connect to the robot Control with Username and Password as the authentification mechanism and insert the username and password that you use to access DESK. The following browser structure shall be displayed if the connection is configured correctly.
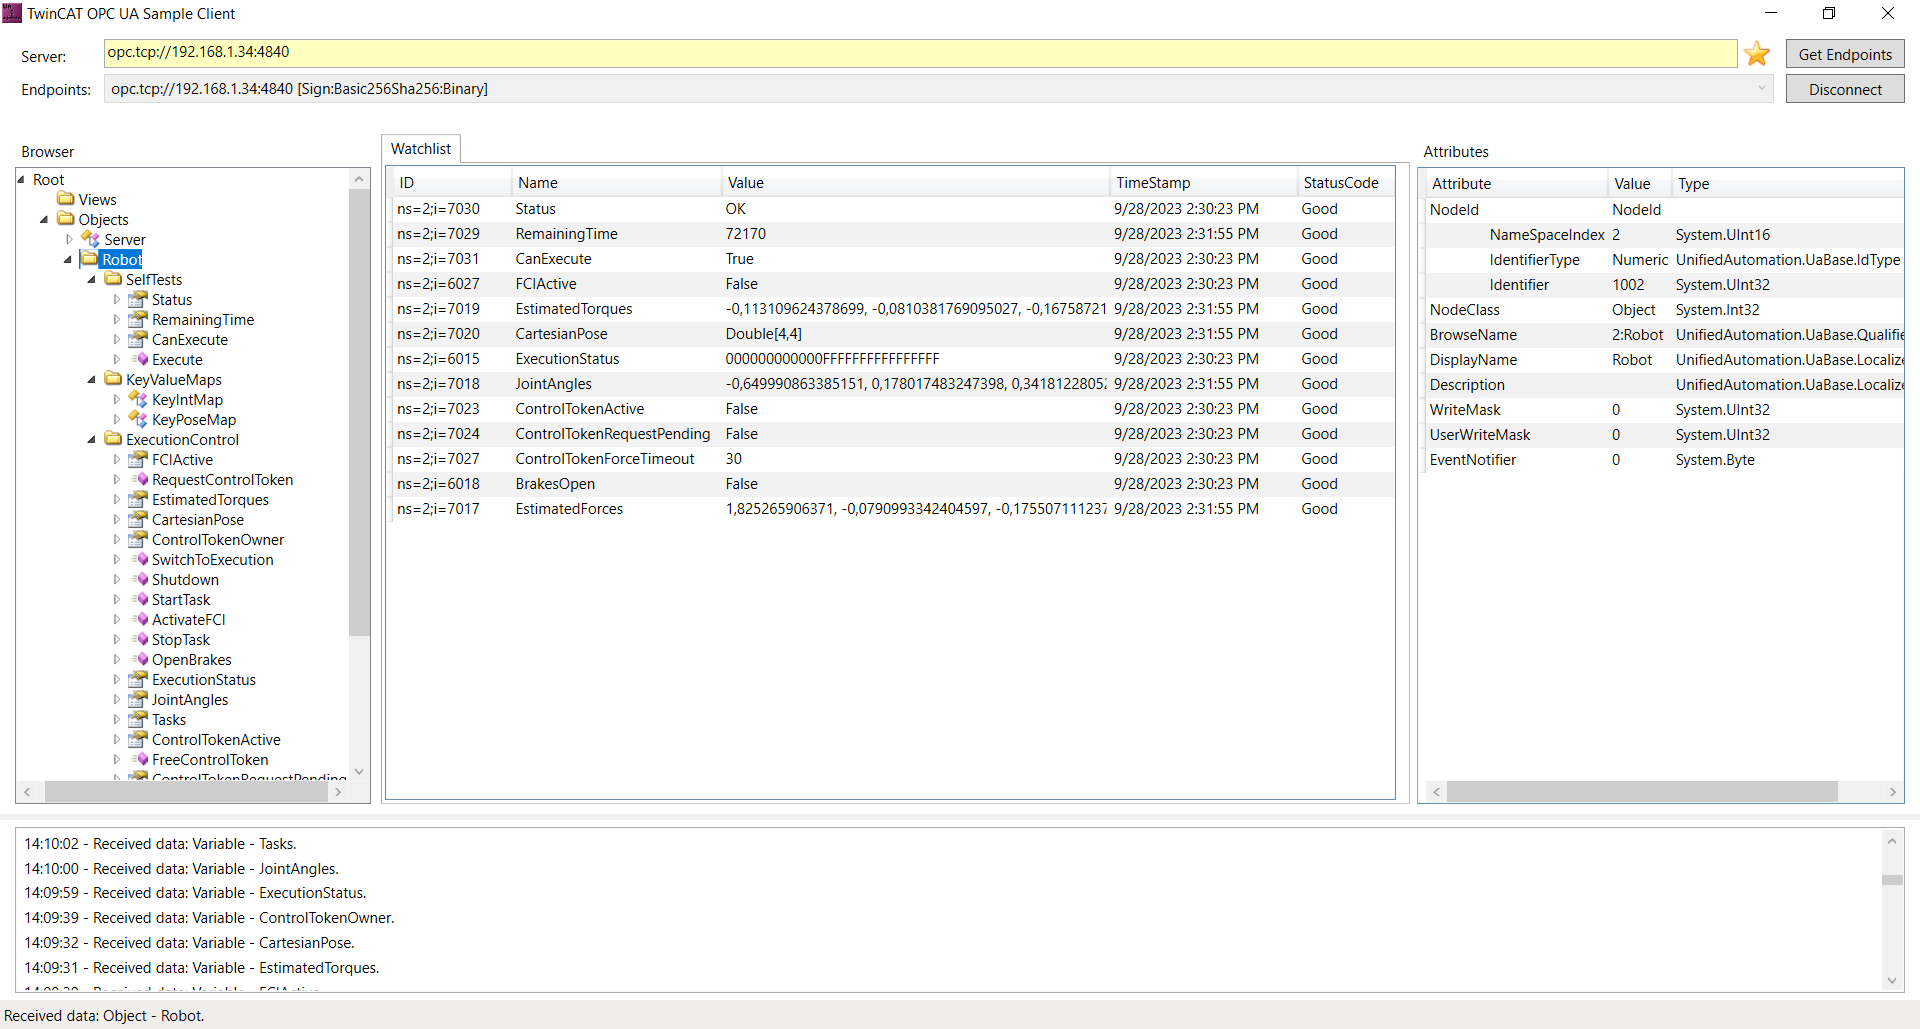
TwinCAT Sample Client
Configuring the connection to the OPC UA server
In the TwinCAT user interface you have to start a new TwinCAT project to set up your connection to the OPC UA server of the robot control. To add
a new project go to File and add a new TwinCAT XAE Project. On the left window the project functions are shown. Under System the licences are managed.
For the OPC UA client configuration go to the I/O function block and with a right click on Devices add a new Item. Select OPC UA - Virtual OPC UA
Device. With a right click on the added device you can add a new client module to the project. In the Client, type opc.tcp://robot.franka.de:4840 or
the IP address of the robot in the Endpoint URL field, as shown in the following picture. Then you can select the Sign:Basic endpoint and enter the
credentials for your robot in the Login Configuration field.
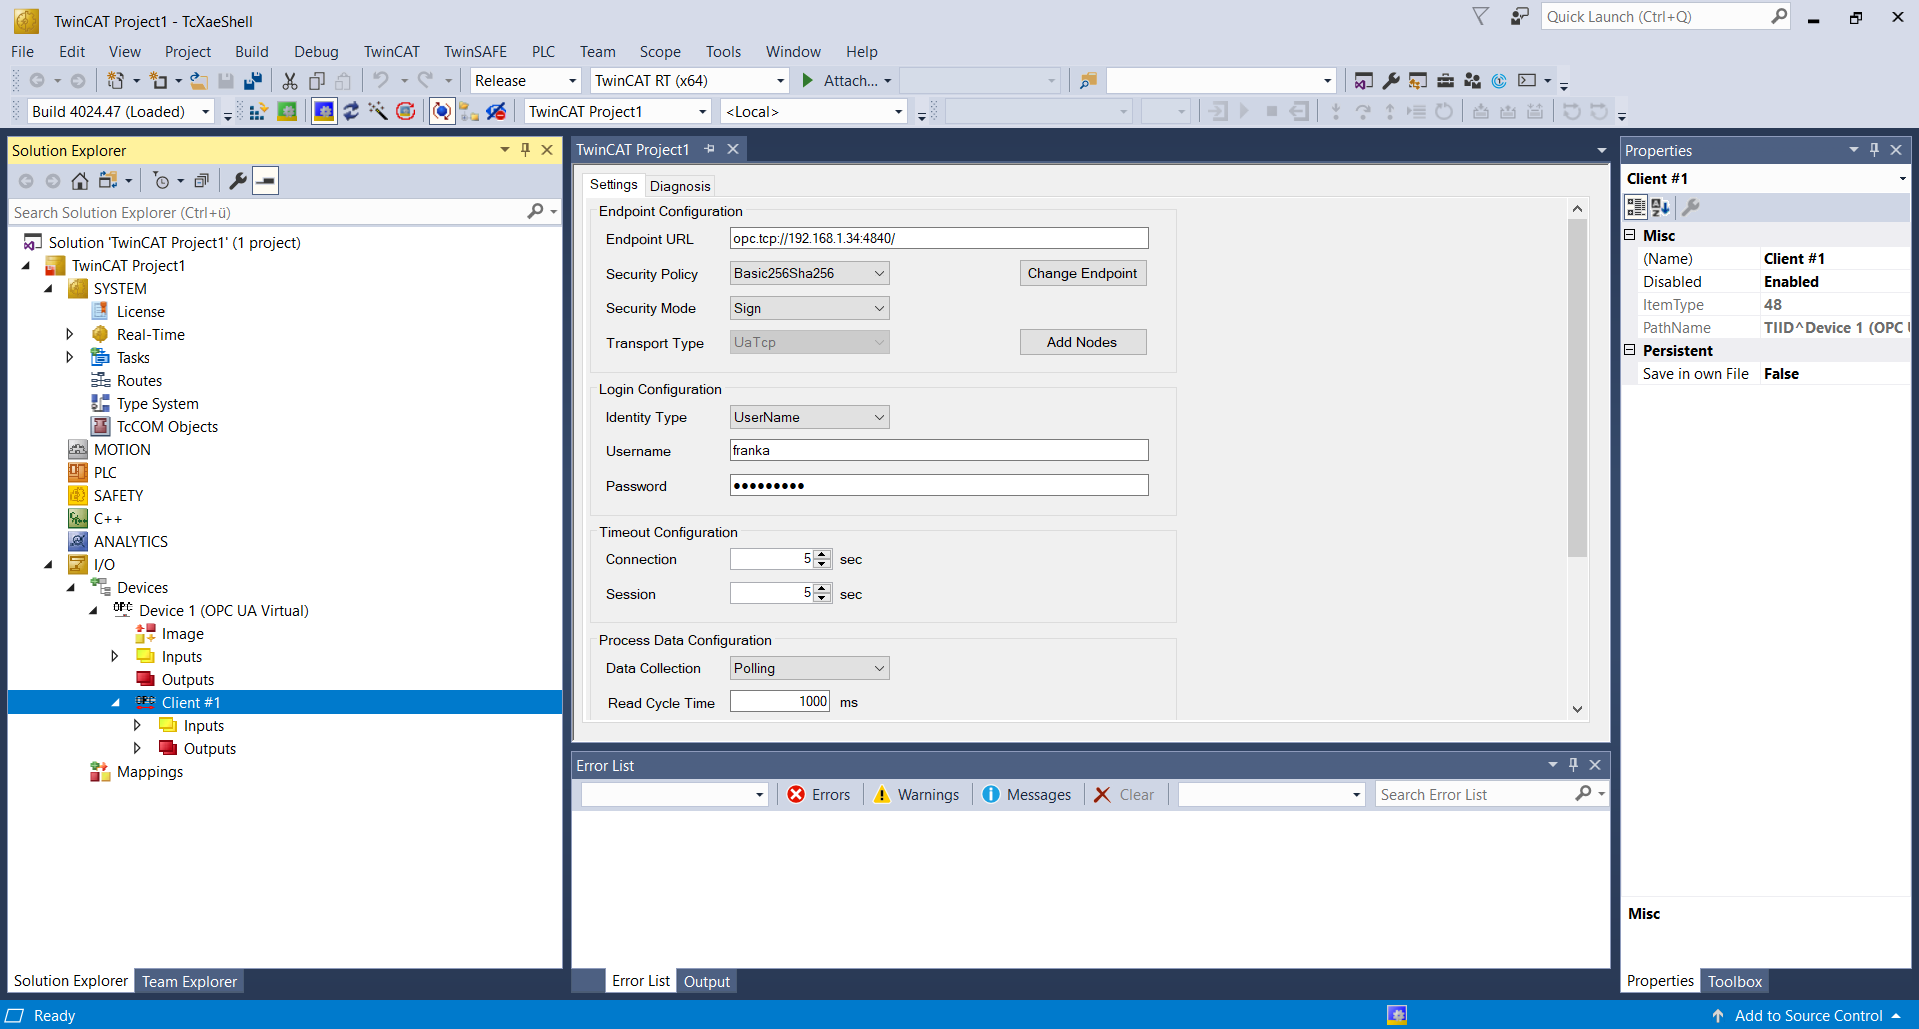
Setup OPC UA Client
Selecting variables and methods
To add OPC UA variables and methods of the robot’s OPC UA server, click on the Add Nodes button. For the first use, a BadCertificateUntrusted
error occurs in a seperate window. You can click trust to continue. There you can browse the available variables on the server, e.g. BrakesOpen and
add them to the list by ticking them.
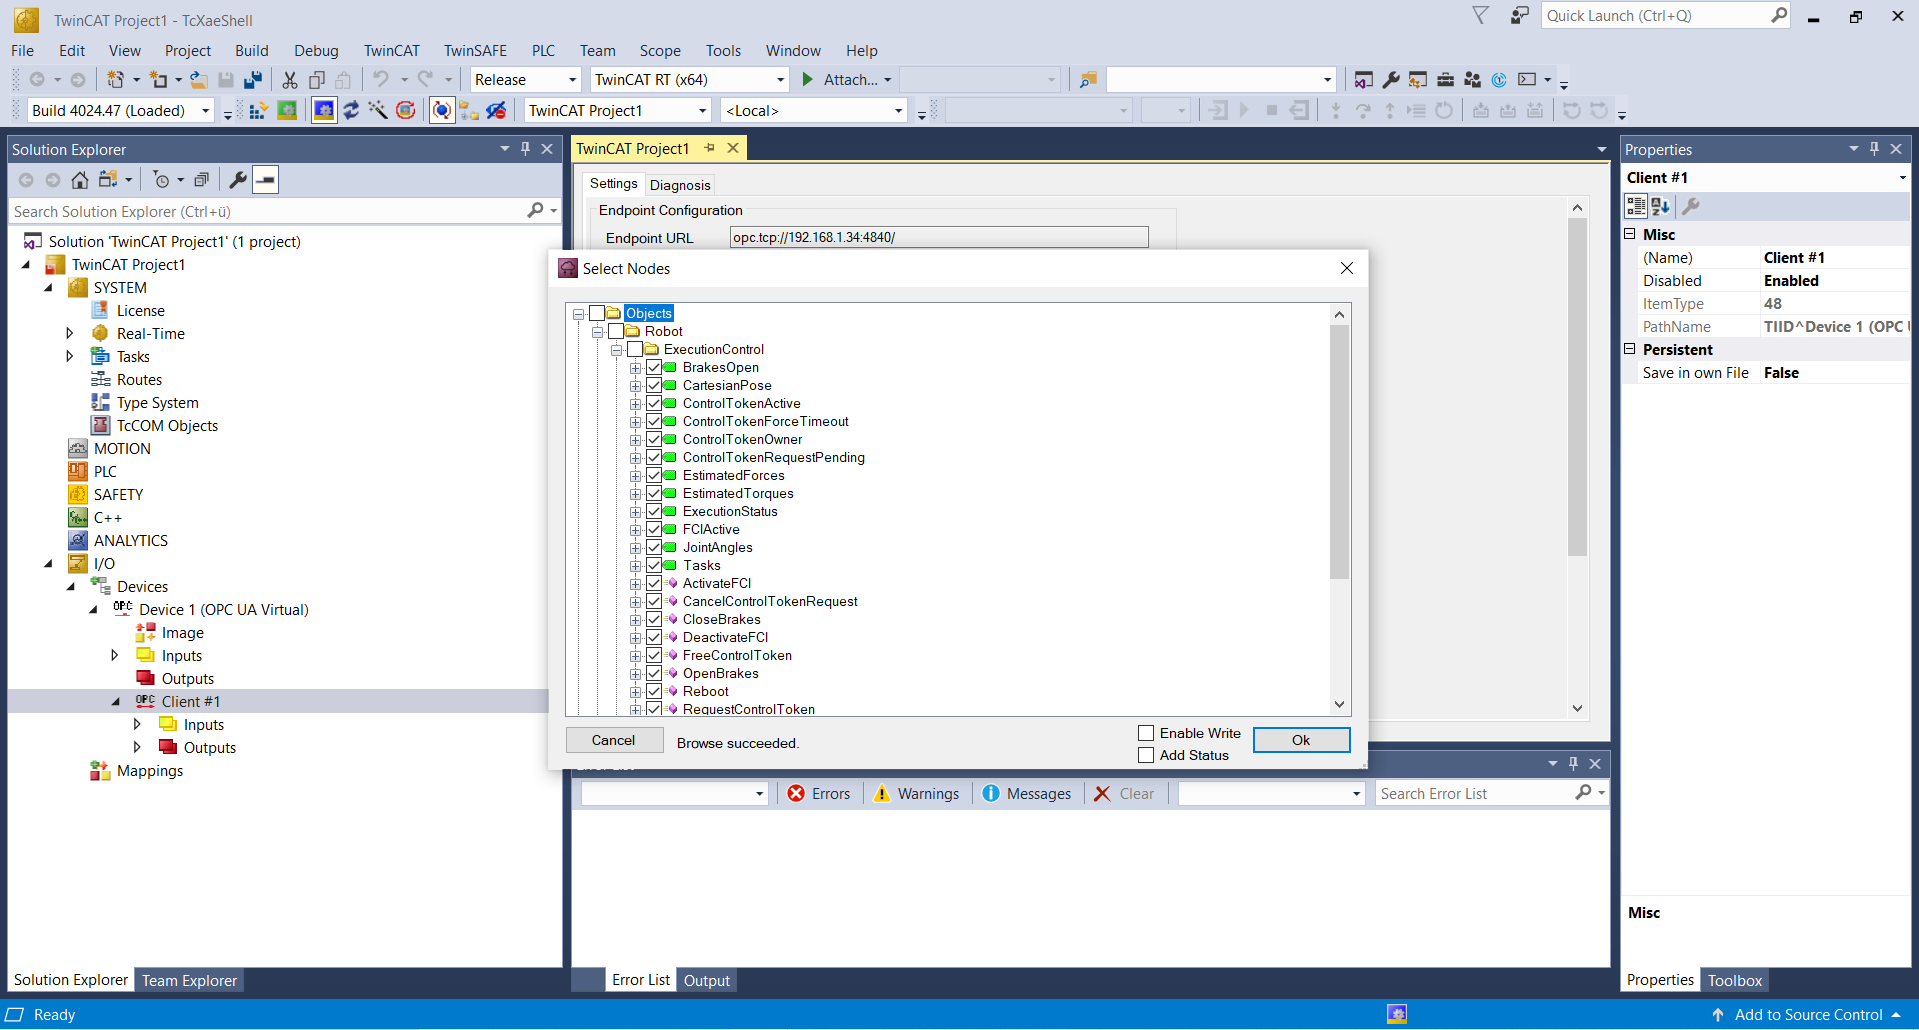
Setup variables and methods
Note that there are limitations for the variables and methods depending on the version of the Franka Emika sytem, see Current Limitations chapter. If a variable or method is added that is currently not supported, an error window appears with the message that the insertion did not work. You can select OK and continue with the supported variables and methods.
Loading the project and starting the OPC UA connection
After all required OPC UA variables and methods have been added, the project has to be built by clicking on Build and select Build Solution. After a successful build the new configuration has to be activated by the Activate Configuration button. Afterwards TwinCAT has to be restarted by clicking “OK” in the window which shows up after the configuration activation or by the Restart TwinCAT (Run Mode) button.
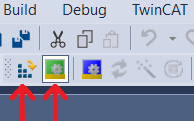
Project configuration
After the restart the TwinCAT OPC UA client is connected to the server of the Franka Emika system. If further variables or methods are added afterwards, the solution has to be built and the configuration activated again.
Read variables and execute methods
If the connection is configured correctly, the values of the OPC UA variables can be checked as shown in the following picture. For example the value of
BrakesOpen is displayed as 0 when the brakes of the robot are closed. After opening the brakes in DESK the online data of the variable shall jump to 1.
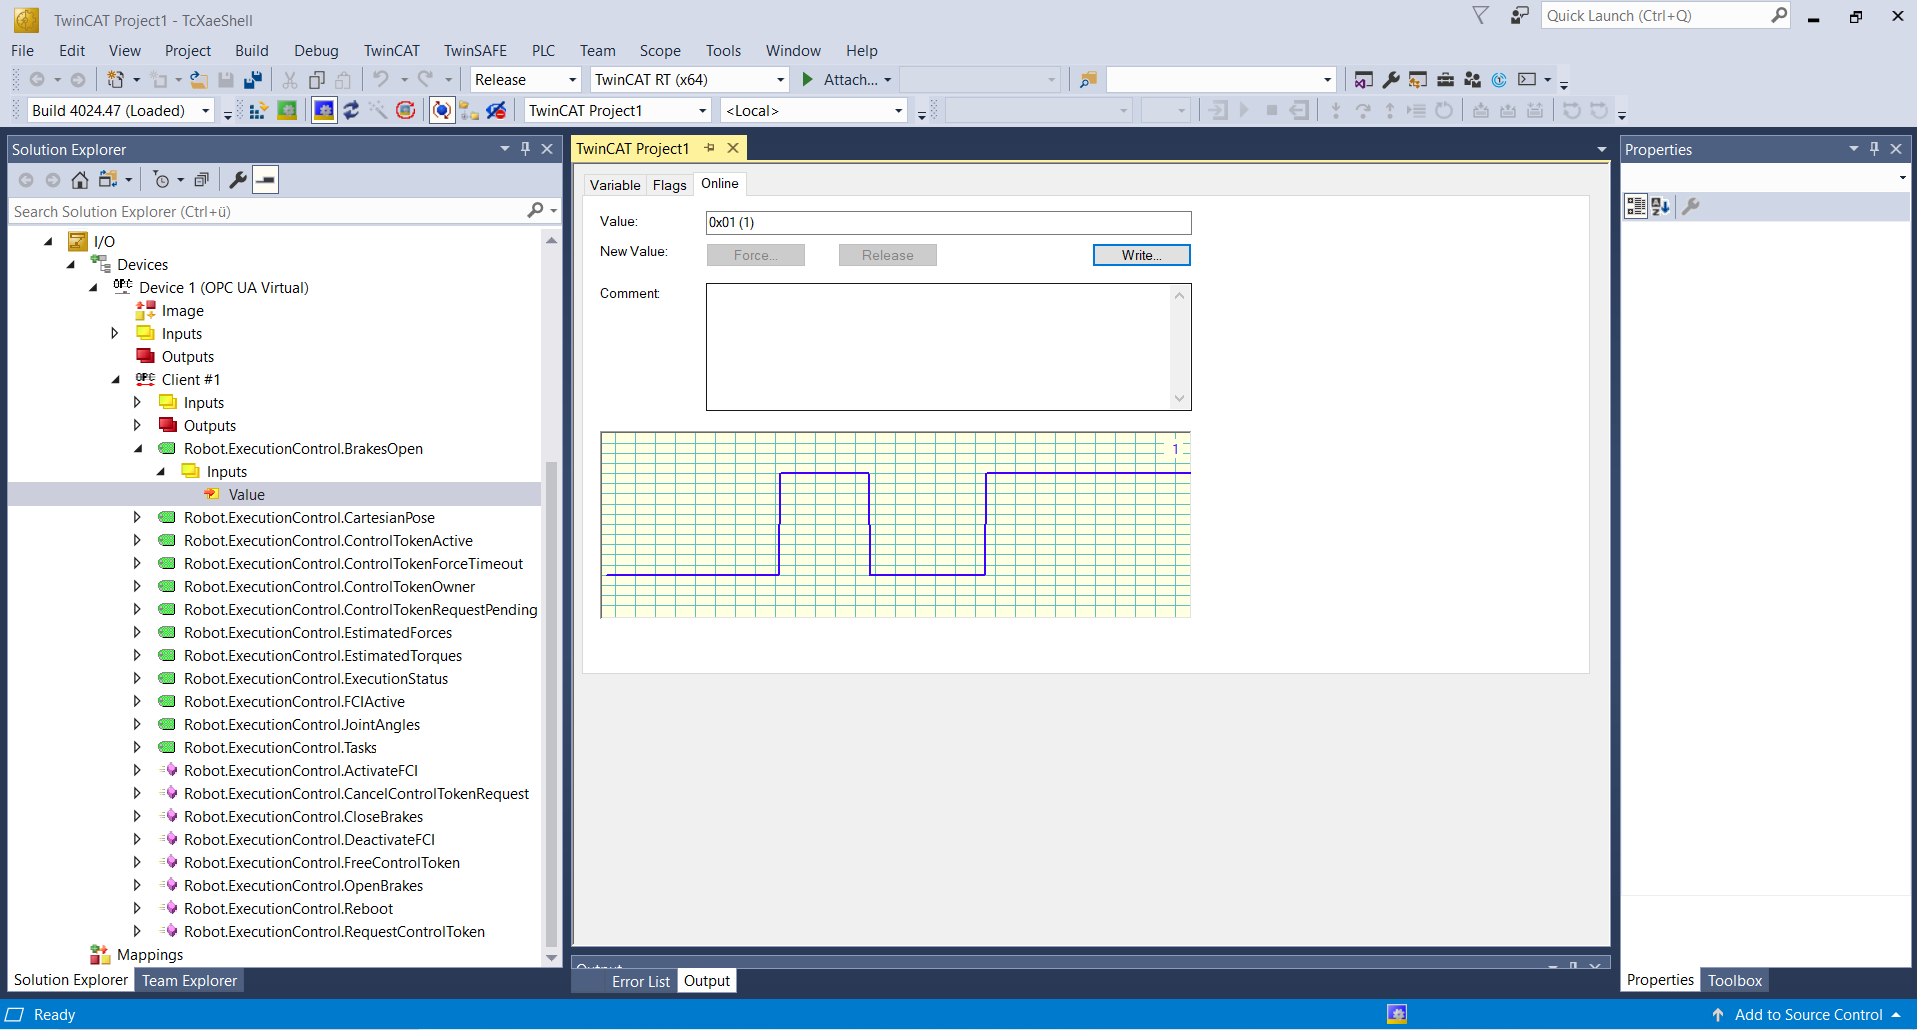
Online data of OPC UA variable
The OPC UA methods, for example RequestControlToken or OpenBrakes include inputs and outputs. The outputs are set to execute the method. In most
methods the Execute output variable is set from 0 to 1 to start the execution of the method. Some methods need further output info for example a “key”
to be executed. During execution the input variable Busy is set from 0 to 1. After the execution Done is set to 1 if the execution was successful
otherwise Error is set to 1 and the corresponding ErrorID is set.
Note
- In order to execute the following methods, first the Control Token for the robot must be requested.
OpenBrakesStartTaskSwitchToExecutionActivateFCIExecuteof SelfTests

Inputs and outputs of OPC UA methods
Current Limitations
Certain methods provided by the robot’s OPC UA server currently cannot be loaded by the TwinCAT 3 client. Right now this includes the variable
Map and methods ReadMap, Replace of KeyPoseMap. The methods ReadKeys and ReadMap of KeyIntMap are only limited usable, because
dynamic arrays are needed which are not supported by TwinCAT 3. Therefore a fixed arraylength of 100 is implemented. However, the method only works if the
entire array is filled. To use the method dummy key value pairs have to be inserted in the array to read the keys or the key value pairs.
In the software version 5.4.0 of the Control there are some extra limitations that will be resolved in the next release. The variable Map and the methods
ReadKeys and ReadMap from KeyIntMap can not be added to the TwinCAT program. Also the methods Read and ReadKeys from KeyPoseMap can not
be used with this system version.