State machine tutorials
Pick & place app tutorial
This chapter is a hands-on introduction to writing apps. At the end, the app you create will be able to pick an object and place it in a user-taught position. While placing the object, the robot will monitor contact forces and open the gripper once it touches the surface. This will compensate for inaccuracies in place position and allow for easy stacking.
The app will be created step by step and we will be adding the functionality in the following order:
Controlling the gripper
Transforming a state machine into an app
Moving the robot arm
Monitoring if the grasped object was lost
Checking for expected collisions
Before you continue make sure you created the tutorial bundle as described
in Creating a simple bundle.
Note
The minimum system image version for this tutorial is 5.1.2.
Warning
Before continuing with the tutorial, make sure that you read through the manual of the robot and did a risk assessment of your cell.
Opening and closing the gripper
Now we will add states responsible for opening and closing the Franka
Hand. Instead of writing the functionality for controlling the Hand from
scratch, we will use the libraries provided by Franka Robotics. As an app
developer you can request access to see what functionality is offered. To add
two new states to Tutorial.lf, modify it as follows:
Tutorial {
  port Success child("gripper_close").port("success")
  port Error child("gripper_open").port("error") or
                  child("gripper_close").port("error")

  entry @{
    printf("Hello World!")
  }@

  --> gripper_open <- fe_lib_gripper__move {
    port success -> gripper_close
  } where {
    width: 0.1;
    speed: 0.2;
  }

  gripper_close <- fe_lib_gripper__grasp {
  } where {
    width: 0.05;
    speed: 0.1;
    force: 30.0;
  }
}
We nest gripper_open and gripper_close as child states of Tutorial.
By using the <- arrow we declare those two as link states, inheriting all
the elements of the fe_lib_gripper__move and fe_lib_gripper__grasp
states. The library will take care of calling the necessary operations to
operate the gripper. The --> arrow declares gripper_open as the first
child, which will be activated whenever the root state is activated. The
where { ... } clause is used to parameterize the states, here simply using
hardcoded values. And finally, the port statements were modified as well:
port Success child("gripper_close").port("success")
This line specifies that the Tutorial state should exit through the
Success port whenever the nested state's port success is reached.
Note that we use the success port which gripper_close inherits
from fe_lib_gripper__grasp.
Before we can successfully build our tutorial bundle again, we have to
specify any extra dependency our bundle uses as a build dependency (see
Handling Dependencies).
In this tutorial we make use of the Franka Libraries. These libraries
are available to all app developers and are installed on any robot containing
the basic app package. When compiling your bundle you need to use the
--ignore-dependencies option to treat the error of missing libraries during
compile time as a warning. Further, add the corresponding name of the used
library like fe_lib_robot or fe_lib_gripper to the manifest of your
bundle. When distributing the app through the Franka World, it will make sure
that the in the manifest specified bundles are installed when your app gets
installed to the robot.
Note
Make sure that the basic app package is installed on the robot before continuing. This package can be installed through the Franka World.
$ ride bundle compile bundles/tutorial --ignore-dependencies
/home/<user>/bundles/tutorial/manifest.json: WARN
    Missing or undeclared dependencies: fe_lib_gripper__grasp, fe_lib_gripper__move
/home/<user>/bundles/tutorial.bundle

$ ride bundle install bundles/tutorial.bundle
Then start the modified state machine using the commands from above. The
gripper should now open and close. The trace indicates how execution transfers
from gripper_open to gripper_close. Notice that the parent state
Tutorial remains active:
$ ride execution start -t Tutorial
Waiting for 5 seconds to initiate motion, press CTRL-C to abort
Waiting for 4 seconds to initiate motion, press CTRL-C to abort
Waiting for 3 seconds to initiate motion, press CTRL-C to abort
Waiting for 2 seconds to initiate motion, press CTRL-C to abort
Waiting for 1 seconds to initiate motion, press CTRL-C to abort
Execution (34) of Tutorial [RUNNING]
Tutorial.gripper_open [ACTIVE]

Execution (34) of Tutorial [RUNNING]
Tutorial.gripper_close [ACTIVE]

Execution (34) of Tutorial [FINISHED]
Tutorial [RESULT]:
{ error_cause: nil; }
These states interact with the gripper service. You can see which
operations and events a service provides using the ride service list
command. You can call ride service echo gripper gripper_state in a
separate terminal to observe how the gripper_state is modified
during the execution of Tutorial state machine.
Wrapping state machines in apps
To be used in Franka Desk, the state machine needs to be defined as an app. apps
are state machines which match a specific interface. Apps must have at least one
port named Success and one port named Error. In addition, the
resultType must contain at least one string field named error_cause.
In case of an error (Error port is true) the system stops the execution and the
error_cause is displayed in Desk. This message should provide an indication
of the problem to the user. Additional fields are possible though. The
following code snippet shows the required content of an app.
name {
  port Success true
  port Error false

  clientData {
    type : "app";
    name : "Name";
  }

  resultType {
    string error_cause;
  }
}
In addition to the introduced parts of a state machine, an app contains client data, which describes the visualization of the app in Franka Desk. In addition to the two mandatory fields included in the above example that client data must contain in order to constitute an app, there are several other optional ones. Refer to Client Data for the full specification.
To use the Tutorial state machine as an app, we add the clientData,
resultType and some actions to pass the error_cause of the child states
to the root state.
clientData {
  type : "app";
  name : "Pick Place";
  color : "#B6E591";
  requiredParameters: [{source: speed; localParameter: speed;}];
  image : @{
    <svg><use href="bundles/tutorial/Tutorial_logo.svg#icon"></use></svg>
  }@;
}

resultType {
  string error_cause;
}

action child("gripper_open").port("error") @{
  setResult({error_cause = child("gripper_open").result.error_cause})
}@
action child("gripper_close").port("error") @{
  setResult({error_cause = child("gripper_close").result.error_cause})
}@
The parameter speed is in this case sourced from the parameters of the task.
The task parameter can be changed by clicking on the task name:
Be aware, that the parameter could also be modified by a group where the app is in, like a 'Cartesian Compliance' group.
The following image depicts how an app with a certain color and image
appears in the library in Franka Desk. The name is shown below and should be
kept short.

Download the Tutorial_logo.svg file
and place it into the resources folder of the tutorial folder (see
Guidelines for SVG images for more detailed information).
.
└── bundles
  └── tutorial
      ├── manifest.json
      ├── resources
      │  └── Tutorial_logo.svg
      └── sources
         └── Tutorial.lf
Compile and install as before. You should now see a block similar to the one depicted above appear in Desk. Drag it onto a new task and press start. You can either test the task using Test & Jog in programming mode or by switching to execution mode More information about the different modes can be found in the robot manual. The gripper should open and close.
When you trace the execution using ride execution trace, notice the
difference of starting a task to directly calling the Tutorial state. Since
tasks are state machines as well, you can find the name of your task in the
list obtained from ride node list, and similarly start it using
ride execution start.
$ ride execution trace
...
Execution (40) of 0_exampletask [RUNNING]
0_exampletask.timeline_body.Tutorial.skill.gripper_open [ACTIVE]
Execution (40) of 0_exampletask [RUNNING]
0_exampletask.timeline_body.Tutorial.skill.gripper_close [ACTIVE]
Execution (40) of 0_exampletask [FINISHED]
Execution [STOPPED]

$ ride execution start -t Tutorial
...
Execution (38) of Tutorial [RUNNING]
Tutorial.gripper_open [ACTIVE]
Execution (38) of Tutorial [RUNNING]
Tutorial.gripper_close [ACTIVE]
Execution (38) of Tutorial [FINISHED]
Tutorial [RESULT]:
{ error_cause: nil; }
User parameterization
We want to make the gripper width parameterizable by the user of the app.
Therefore, parameters, i.e. gripper_open_width and gripper_closed_width
are introduced. Later we'll create a context menu for the app, which contains
components to manipulate those parameters in Desk (see Context menus).
We replace the hard coded values for width with the new parameters and set
default values in the where { ... } clause.
  parameterType {
    float gripper_open_width;
    float gripper_closed_width;
  }

  --> gripper_open <- fe_lib_gripper__move {
    port success -> gripper_close
  } where {
    width: parameter.gripper_open_width;
    speed: 0.1;
  }

  gripper_close <- fe_lib_gripper__grasp {
  } where {
    width: parameter.gripper_closed_width;
    speed: 0.1;
    force: 30.0;
  }
} where {
  gripper_open_width: nil;
  gripper_closed_width: nil;
}
If the parameter is initialized with nil, the user is forced to
parameterize it, because an app can only be executed if all parameters are
defined.
In order to parameterize the app from Desk, a context menu entry needs to be
added to the clientData. The context menu visually guides you through the
parameterization process. To have a reference of how that could look like,
create a task in Desk and drag an app of the basic app package into the task.
Then click on the app and you'll see an example of a context menu. Check the
manual shipped with the robot for more details.
clientData {
  contextMenu : @{
    <step id="pick-motion" name="Gripper Width" class="flex-column">
      <step id="approach-width" name="Open fingers">
        <gripper-control params="
          width: parameter('gripper_open_width'),
          step: step
        "></gripper-control>
      </step>
      <step id="pick-width" name="Close fingers">
          <gripper-control params="
            width: parameter('gripper_closed_width'),
            step: step
          "></gripper-control>
      </step>
    </step>
  }@;
  ...
}
You can also download the .lf file with a basic context menu here and replace the content with the one of your
Tutorial.lf file. After installing the app, you will able to teach
the gripper width using Desk. To do so, move the physical fingers of the
Franka Hand, press 'Set To Current Width' and then 'Continue' to the next
parameter.
Moving the robot
Now that we can control the gripper, we need to move to the object we want to grasp.
The overall strategy is as follows:
Open the gripper.
Move to the object.
Close the gripper.
Retract.
Apart from these three new states to handle the motion, we need one more to calculate the trajectory parameters.
We will introduce the necessary changes step by step, but you can also see the
full .lf file here first, and follow
along.
First, the parameters of the two robot poses we want the user to set are added.
The pick_approach pose will also be used for retract, i.e. the robot will
move from the approach pose to the pick pose and back to the approach pose
during the execution. The speed parameter is inherited from the source, as
defined in the requiredParameters in the clientData. The velocity
parameter will be used to control the overall speed of the movement.
parameterType {
  {
    [16]float pose;
    []float joint_angles;
  } pick_approach;
  {
    [16]float pose;
    []float joint_angles;
  } pick_pose;
  float speed;
  float velocity;
  float gripper_open_width;
  float gripper_closed_width;
}
Note that you can use structs and array types for your parameters as is the case for the poses.
The state machine library franka_libraries provides a the state machine
fe_lib_robot__move_via_with_move_configuration which we'll make use of.
Here a short summary of what the library does:
This library will remove all old points, insert the list of provided
points in the `poses` parameter and move along the trajectory with the
given `controller_mode`.  Additionally to this, parameters for the maximum
allowed deviation from the taught trajectory during the path and at the
goal pose are provided, i.e. `maximum_path_deviation` and `maximum_goal_pose_deviation`
(default: `translation`: 0.1m, `rotation`: 0.1rad `elbow`: 0.1rad). If the motion
succeeds, the result will be empty. Otherwise it will contain the robot state
at the time of the error as well as an error_cause. Every time the
state machine is started, it will make sure that the given parameters for
impedance and collision thresholds are set before actually starting the motion.
This library requires a trajectory as input, therefore we first need to merge
the taught poses into a trajectory. To do so we use an other library state
machine called fe_lib_robot__merge_trajectory_and_kinematic_parameters.
Here a short summary of what this library does:
This library will the take a list of points for approach and retract as
well as the end/start points and create the approach and retract
trajectory. If the velocity or acceleration/deceleration are below the
minimum possible value, they will be capped.
Add a new start state:
--> compute_parameters <- fe_lib_robot__merge_trajectory_and_kinematic_parameters {
  port done -> gripper_open
} where {
  add_to_approach: true;
  add_to_retract: false;
  approach: [parameter.pick_approach];
  approach_end: parameter.pick_pose;
  retract_start: parameter.pick_pose;
  retract: [parameter.pick_approach];
  cartesian_velocity_factor_approach: parameter.velocity*parameter.speed;
  cartesian_acceleration_factor_approach: 0.8*parameter.velocity*parameter.speed;
  cartesian_deceleration_factor_approach: 0.8*parameter.velocity*parameter.speed;
  cartesian_velocity_factor_ptp: parameter.velocity*parameter.speed;
  cartesian_acceleration_factor_ptp: 0.8*parameter.velocity*parameter.speed;
  cartesian_deceleration_factor_ptp: 0.8*parameter.velocity*parameter.speed;
  cartesian_velocity_factor_retract: parameter.velocity*parameter.speed;
  cartesian_acceleration_factor_retract: 0.8*parameter.velocity*parameter.speed;
  cartesian_deceleration_factor_retract: 0.8*parameter.velocity*parameter.speed;
}
Note that the parameters approach and retract expect trajectories. As we
only teach one approach pose, we wrap the parameter with square brackets. The
overall speed of the movement is influenced by two parameters: The speed
parameter which is task-specific and the velocity parameter which is
app-specific.
Next, we can introduce the movement states:
gripper_open <- fe_lib_gripper__move {
  port success -> approach
} where {
  width: parameter.gripper_open_width;
  speed: 0.1;
}

approach <- fe_lib_robot__move_via_with_move_configuration {
  port success -> gripper_close
} where {
  poses: child("compute_parameters").result.approach;
}

gripper_close <- fe_lib_gripper__grasp {
  port success -> retract
} where {
  width: parameter.gripper_closed_width;
  speed: 0.1;
  force: 30.0;
}

retract <- fe_lib_robot__move_via_with_move_configuration {
} where {
  poses: child("compute_parameters").result.retract;
}
Notice that gripper_open is no longer the start state, and how we use
child("compute_parameters").result to access the results of
compute_parameters in its siblings.
Having defined our states, we can now go back to update our ports:
port Success child("retract").port("success")
port Error child("approach").port("error") or
           child("gripper_open").port("error") or
           child("gripper_close").port("error") or
           child("retract").port("error")
And update the error messages and parameter initialization:
  action child("gripper_open").port("error") @{
    setResult({error_cause = child("gripper_open").result.error_cause})
  }@
  action child("approach").port("error") @{
    setResult({error_cause = child("approach").result.error_cause})
  }@
  action child("retract").port("error") @{
    setResult({error_cause = child("retract").result.error_cause})
  }@
  action child("gripper_close").port("error") @{
    setResult({error_cause = child("gripper_close").result.error_cause})
  }@
} where {
  pick_approach: nil;
  pick_pose: nil;
  speed: nil;
  velocity: nil;
  gripper_open_width: nil;
  gripper_closed_width: nil;
}
Finally, adjust the context menu to the following:
contextMenu : @{
<step id="pick-motion" name="Pick Motion" class="flex-column">
<style>
.gripper {
height: 95px;
}
.pose-content {
width: 130px;
height: 107px;
}
.object {
height: 38px;
margin-left: 1px;
}
</style>
<div class="flex-row margin-bottom-60">
<step id="pick-approach" class="margin-right-60"
name="Position above"
label="Position the Hand above the object.">
<robot-pose params="
pose: parameter('pick_approach'),
relatedPoses: {
'pick-pose': parameter('pick_pose'),
'pick-approach': parameter('pick_approach')
},
step: step,
path: path,
componentProviderAPI: componentProviderAPI
">
<div class="pose-content">
<svg class="center-top gripper"><use href="bundles/tutorial/gripper_opened.svg#icon"></use></svg>
</div>
</robot-pose>
</step>
<step id="approach-width"
name="Open fingers" label="Set the width between the fingertips such that it is larger than the object at its picking points.">
<gripper-control params="
width: parameter('gripper_open_width'),
step: step
"></gripper-control>
</step>
</div>
<div class="flex-row">
<step id="pick-pose" class="margin-right-60"
name="Pick position"
label="Position the Hand such that the object is between the fingertips.">
<robot-pose params="
pose: parameter('pick_pose'),
reference: true,
relatedPoses: {
'pick-pose': parameter('pick_pose'),
'pick-approach': parameter('pick_approach')
},
step: step,
path: path,
componentProviderAPI: componentProviderAPI
">
<div class="pose-content" top="95px" left="65px">
<svg class="center-bottom static-dark-gray visible object">
<use href="bundles/tutorial/object.svg#icon"></use>
</svg>
<svg class="center-top gripper">
<use href="bundles/tutorial/gripper_holding.svg#icon"></use>
</svg>
</div>
</robot-pose>
</step>
<step id="pick-width"
name="Close fingers"
label="Close the fingers such that the object is firmly grasped.">
<gripper-control params="
width: parameter('gripper_closed_width'),
step: step
"></gripper-control>
</step>
</div>
</step>
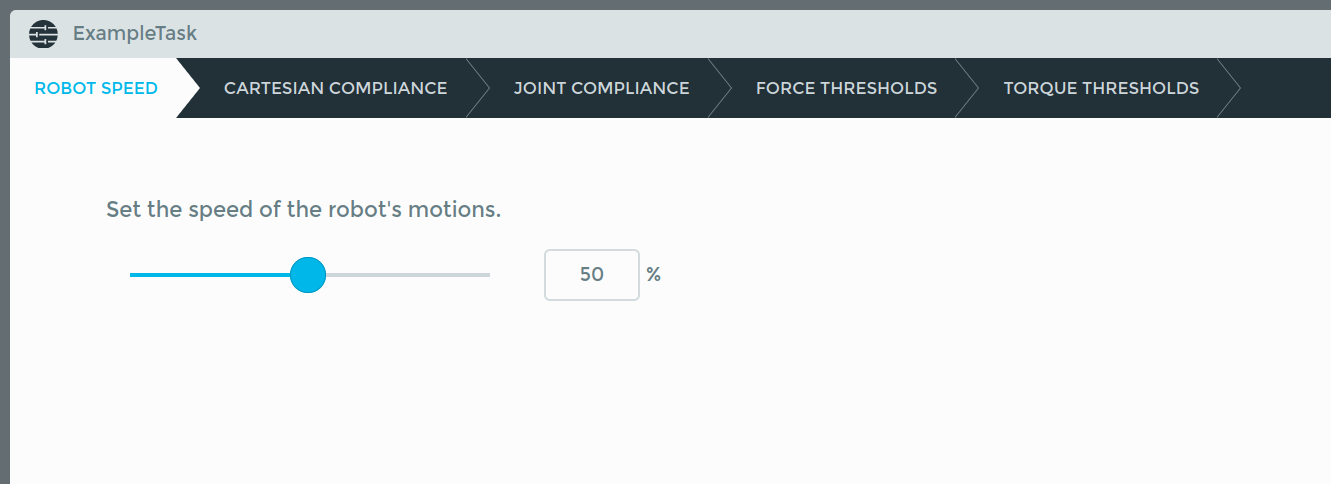
<step id="velocity" name="Velocity" class="flex-column" label="Set the velocity of the robot's motion.">
<h2 data-bind="text: step.label"></h2>
<linear-slider params="
value: parameter('velocity').multiply(100),
min: 5, max: 100, increment: 5,
unit: '%',
step: step
"/>
</step>
}@;
You can download the .lf file containing all that changes from here and replace the content with the one of your
Tutorial.lf file. To have a proper
visualization, place
gripper_opened.svg,
gripper_holding.svg and
object.svg inside the resources folder.
If you have tasks utilizing a previous versions of your Tutorial app
already, you first need to delete the instances of Tutorial to prevent
conflicts. Then you can install your bundle on the robot. If the app is
installed correctly, you are now able to teach the poses. Run the app and watch
the robot grasp an object!
Barriers
Next, we want to transport our object. While we move the robot, we would like to monitor the gripper service and exit with an error if the grasped object is lost during transit. In such cases, we can use barriers for parallel execution.
For better modularization, we will implement that functionality in a separate
file. Create a move_monitored.lf file next to Tutorial.lf, and enter
the following:
move_monitored {
  port success child("move").port("success")
  port error child("move").port("error") or
             child("observe_part_lost").port("part_lost")

  parameterType {
    []{
      {[16]float pose;} pose;
      bool point2point;
      float cartesian_velocity_factor;
      float cartesian_acceleration_factor;
      float cartesian_deceleration_factor;
      float q3;
    } poses;
  }

  resultType {
    string error_cause;
  }

  --> barrier move_and_check {
    -> move
    -> observe_part_lost
  }

  move <- fe_lib_robot__move_via_with_move_configuration {
  } where {
    poses: parameter.poses;
  }

  observe_part_lost <- fe_lib_gripper__observer {
  }

  action child("observe_part_lost").port("part_lost") @{
    setResult({ error_cause = "Part was lost during motion." })
  }@

  action child("move").port("error") @{
    setResult({ error_cause = child("move").result.error_cause })
  }@
}
The barrier keyword indicates that move_and_check node is a barrier. It
activates two states in parallel, move and observe_part_lost:
--> barrier move_and_check {
  -> move
  -> observe_part_lost
}
The move_monitored ports are connected to move's ports as before, but
the error port can also be reached when observe_part_lost exits through
part_lost. If that happens, the execution of move will be preempted.
To compute the pose for our new state, let's add a compute_parameters_place
state to Tutorial.lf:
compute_parameters_place <- fe_lib_robot__merge_trajectory_and_kinematic_parameters {
  port done -> gripper_open
} where {
  add_to_approach: true;
  add_to_retract: false;
  approach: [parameter.place_approach];
  approach_end: parameter.place_pose;
  retract_start: parameter.place_pose;
  retract: [parameter.place_approach];
  cartesian_velocity_factor_approach: parameter.velocity*parameter.speed;
  cartesian_acceleration_factor_approach: 0.8*parameter.velocity*parameter.speed;
  cartesian_deceleration_factor_approach: 0.8*parameter.velocity*parameter.speed;
  cartesian_velocity_factor_ptp: parameter.velocity*parameter.speed;
  cartesian_acceleration_factor_ptp: 0.8*parameter.velocity*parameter.speed;
  cartesian_deceleration_factor_ptp: 0.8*parameter.velocity*parameter.speed;
  cartesian_velocity_factor_retract: parameter.velocity*parameter.speed;
  cartesian_acceleration_factor_retract: 0.8*parameter.velocity*parameter.speed;
  cartesian_deceleration_factor_retract: 0.8*parameter.velocity*parameter.speed;
}
Now we can use our move_monitored state! After using it to touch the
surface, we want to open the gripper. Let's add two new states: transport
and gripper_open_place:
retract <- fe_lib_robot__move_via_with_move_configuration {
  port success -> transport
} where {
  poses: child("compute_parameters").result.retract;
}

transport <- move_monitored {
  port success -> gripper_open_place
} where {
  poses: child("compute_parameters_place").result.approach;
}

gripper_open_place <- fe_lib_gripper__move {
} where {
  width: parameter.gripper_place_open_width;
  speed: 0.1;
}
Another step was added to the context menu, allowing the user to teach the
placing motion. Similarly as before, the ports, parameters, context menu and
resulting string assignments have to be updated. Try to first do that on your
own. If you got stuck, compare your solution to this solution. Be aware, that this solution state machine
is called Tutorial_monitored.
Execute your app and try to remove the object from the gripper during motion. The app should stop with an error message: "Part was lost during motion".
Moving until contact
At this stage, we have a functioning pick and place app. Let's extend it by moving to contact for the place motion. When the robot collides, instead of stopping with an error, we will check if the collision took place within a defined area. If it did, we will recover from the error, and continue the execution instead.
Add a check_error.lf state to the Tutorial bundle:
check_error {
  port success result ~= nil and result.expected -> reset
  port error result ~= nil and result.expected == false
  parameterType {
      [16]float expected_pose;
      string error_cause;
      {
        [7]float tau_ext;
        [6]float K_F_ext_hat_K;
        {
          [16]float pose;
        } O_T_EE;
        [2]float elbow;
        int cartesian_goal_id;
        [7]float q;
        [6]float cartesian_collision;
        [7]float joint_collision;
        []string robot_errors;
      } move_error;
      {
        float x;
        float y;
        float z;
      } contact;
  }
  resultType {
    bool expected;
    string error_cause;
  }
  entry @{
    if parameter.move_error == nil or not utils.contains(parameter.move_error.robot_errors, {"cartesian_reflex_flag", "joint_reflex_flag"}) then
      setResult({expected = false, error_cause = "Unexpected error. " .. parameter.error_cause })
    else
      local current_ee = parameter.move_error.O_T_EE.pose
      if (abs(current_ee[13] - parameter.expected_pose[13]) > parameter.contact.x or
          abs(current_ee[14] - parameter.expected_pose[14]) > parameter.contact.y or
          abs(current_ee[15] - parameter.expected_pose[15]) > parameter.contact.z) then
        setResult({expected = false, error_cause = "Error outside of defined radius. " .. parameter.error_cause})
      else
        setResult({expected = true})
      end
    end
  }@
}
In the check_error state we have as input the move_error the
robot_service returns to the moveWithConfiguration operation call.
The state checks if a Cartesian or joint reflex is triggered. When that is
the case, it is checked if the robot stopped in a spherical area around the
expected_pose. If that is the case, it triggers the success port, meaning
that the occurred move error was expected. The Cartesian or joint reflex is
configured through the setCollisionBehavior operation call of the
robot_service or through the moveWithConfiguration operation call
which is called in our case in the
fe_lib_robot__move_via_with_move_configuration library.
The new state is used in move_monitored.lf:
parameterType {
  ...
  {
    float x;
    float y;
    float z;
  } contact;
}

move <- fe_lib_robot__move_via_with_move_configuration {
  port error -> check
} where {
  poses: parameter.poses;
}

check <- check_error {
  port success -> reset
} where {
  expected_pose: parameter.poses[#parameter.poses].pose.pose;
  contact: parameter.contact;
  error_cause: child("move").result.error_cause;
  move_error: child("move").result.move_error;
}

reset <- wait_until_reset_collision {
}
The error port leads of the move state to a check state, where its
move_error result is inspected. The # operator in #parameter.poses
returns the length of its operand. Here it's used to obtain the last pose
passed to the move state. As described above, the collision area check will
be computed with respect to that position. Further, the new parameter,
contact, has to be added to the parameterType.
You probably already noticed that we linked against a state machine called
wait_until_reset_collision. Create a file named
wait_until_reset_collision.lf in the tutorial bundle and past the following
content into it:
wait_until_reset_collision {
  port success child("reset").port("success")
  port error child("reset").port("error")

  clientData {
    description: @{
      This state machine will wait until no external forces are measured anymore
      and then reset the collision errors.
    }@;
  }

  parameterType {
    float duration;
  }

  --> wait_for_release {
    port released result -> wait

    resultType bool

    entry @{
      setResult(false)
    }@

    action service("robot").event("robot_state") ~= nil @{
      local robot_state = service("robot").event("robot_state")
      local released = true
      for i=1,#robot_state.cartesian_contact do
        if robot_state.cartesian_contact[i] > 1 then
          released = false
        end
      end
      for i=1,#robot_state.joint_contact do
        if robot_state.joint_contact[i] > 1 then
          released = false
        end
      end
      setResult(released)
    }@
  }

  wait {
    port success service("timer").operation("wait").status == "success" -> reset

    parameterType float

    entry @{
      service("timer").operation("wait").call(parameter)
    }@
  } where parameter.duration

  reset <- reset_errors {}
} where {
  duration: 0.5;
}
This state machine will wait until no external forces are measured anymore and
then reset the collision errors. Additionally, we link to the reset_error
state machine which is not part of any library. Therefore we need to include it
as well in our bundle. Create a file named reset_error.lf and paste the
following content:
reset_errors {
  port success service("robot").operation("acknowledgeError").status == "success"
  port error service("robot").operation("acknowledgeError").status == "error"

  clientData {
    description: @{
      This state machine calls 'acknowledgeError'. This will take the
      robot out of its reflex state. Please be aware that executing this in
      case of a 'position' limit violation (i.e. joint limit, Cartesian limit,
      self-collision etc.) it will cause the robot to move in order to mitigate
      the error.
    }@;
  }

  entry @{
    service("robot").operation("acknowledgeError").call({})
  }@

  action service("robot").operation("acknowledgeError").status == "error" @{
    setResult(error_handling.process_error(service("robot").operation("acknowledgeError").error))
  }@

  resultType {
    string error_cause;
    [][]string error_codes;
  }
}
Have a look in the description above to know what the reset_errors state
machine is about.
Port definitions of the the move_monitored state machine have to be updated.
Try that on your own. If you get stuck, see
here for full changes.
The new parameter, contact, has to be added in parameterType in
Tutorial.lf:
{
  float x;
  float y;
  float z;
} contact;
The values need to be passed into the move_monitored state:
transport <- move_monitored {
  port success -> gripper_open_place
} where {
  poses: child("compute_parameters_place").result.approach;
  contact: parameter.contact;
}
And, finally, we can add some default values for the contact area:
} where {
  pick_approach: nil;
  pick_pose: nil;
  speed: nil;
  velocity: nil;
  gripper_open_width: nil;
  gripper_closed_width: nil;
  place_approach: nil;
  place_pose: nil;
  contact: {
    x: 0.01;
    y: 0.01;
    z: 0.01;
  };
}
See the full version of the file here. Be aware that this solution does not
contain a context menu. Reuse the context menu from before. A good additional
task would be to add a context menu for configuring the allowed contact
area.
Now you're able to successfully compile, upload the bundle to the robot and try the app you just created. Further, provoke errors and see how the task execution behaves.
If you'd like to learn more by improving the app further, here are possible next steps:
The place motion could be divided into two parts: approach, and sensitive place. The first part could be made faster, while the second could increase the compliance values.
Parameters passed to the states can be integrated with the task-wide settings, accessible when the task name is pressed in Desk.
Group tutorial
Groups are containers used to modify the execution behavior of the Apps contained within them. They allow you to build up more complex workflows like looping and conditional branching. Each group defines one or more slots in which child apps and groups can be added.
This chapter is a hands-on introduction to writing groups. At the end, you will have created a looping group, a branching group, a monitoring pattern as well as a group for providing parameters.
The groups will be created step by step, and we will be adding the corresponding functionality in the following order:
Looping group
Branching group
Monitoring
Providing parameters
Simple group
Similar to creating an app we first create a new bundle which contains a state machine.
.
└── bundles
  └── group
      ├── manifest.json
      ├── resources
      └── sources
         └── Group.lf
The Group.lf file will contain the code we create in this tutorial. Since
you already know how to create an app we will start by creating a simple
app called "Group", which will do nothing and succeed immediately.
Group {
  port Success true
  port Error false

  clientData {
    name: "Group";
    type: "app";
  }

  resultType {
    string error_cause;
  }
}
This simple app can already be uploaded and used in Desk. We will now transform this app into a group. The group will still not define any behavior. It will simply start the sequence of child states and terminate, once all child states have run or an error occurs in any of them.
Group {
  port Success child("body").port("Success")
  port Error child("body").port("Error")

  clientData {
    name: "Group";
    type: "group";
    containers: [["body"]];
  }

  resultType {
    string error_cause;
  }

  --> body {
    port Success true
    port Error false

    resultType {
      string error_cause;
    }
  }
}
We have now created a group with one visible slot where apps can be inserted. Each inserted app is being placed into the state body. Each app gets its Success port connected to the next state until the final inserted app. Its Success port will be connected to the Success port of body. The Error ports of all inserted apps will be connected to the Error port of body.
- In order to create a group from an app, we need to:
Change
type: apptotype: groupAdd a field
containers(Array[Path]) to clientData. Each container represents a slot and specifies the path to the state, where apps shall be inserted (see Multiple container - branching group for an example of a multi-slot group).Add the states listed in
containers. They basically need to fulfill theappinterface, i.e have aSuccessand anErrorport and name astring error_causein their result.
We can also add code which will set the error_cause to the error_cause of the failing app:
Group {
  port Success child("body").port("Success")
  port Error child("body").port("Error")

  clientData {
    name: "Group";
    type: "group";
    containers: [["body"]];
  }

  resultType {
    string error_cause;
  }

  exit @{
    if child("body").result ~= nil and child("body").result.error_cause ~= nil then
      setResult({error_cause = child("body").result.error_cause})
    end
  }@

  --> body {
    port Success true
    port Error false

    resultType {
      string error_cause;
    }

    exit @{
      result = { error_cause = nil }
      for i=1,#childNames do
        local c = child(childNames[i])
        if c.result ~= nil and c.result.error_cause ~= nil then
          result.error_cause = c.result.error_cause
        end
      end
      setResult(result)
    }@
  }
}
In order to forward the error_cause to the user, childNames is used to iterate over all children. It is a list containing the names of all children.
If you install this bundle on your system you should see a new entry in the groups list. If you add this entry to a task, you can add apps into this group. The behavior of the apps should not have changed. If an app inside the group errors, the correct error messages should still be shown.
Feel free to modify color, icon and names as you would with apps.
Looping
Now we will add functionality to the group. We can simply add states around our body state and wire them to and from body. So, to create a looping group we can simply add a head state, which decides if the sequence of apps shall run again.
Group {
  port Success child("head").port("done")
  port Error child("body").port("Error")

  clientData { ... }

  resultType { ... }

  exit @{ ... }@

  --> head {
    port continue true -> body
    port done false
  }

  body {
    port Success true -> head
    port Error false

    resultType { ... }

    exit @{ ... }@
  }
}
By simply adding head like this and having every successful completion of the apps re-invoke head we have created an infinite loop. If we now add a parameter describing the number of iterations, we can have the user decide how long the group will loop.
Group {
  port Success child("head").port("done")
  port Error child("body").port("Error")

  clientData { ... }

  parameterType {
    int nr_loops;
  }

  resultType { ... }

  exit @{ ... }@

  --> head {
    port continue variable < parameter -> body
    port done variable >= parameter

    parameterType int
    variableType int

    entry @{
      if variable == nil then
        setVariable(0)
      else
        setVariable(variable + 1)
      end
    }@
  } where parameter.nr_loops

  body { ... }
} where {
  nr_loops: 3;
}
Now we can add a context menu to make the number of loops configurable:
Group {
  port Success child("head").port("done")
  port Error child("body").port("Error")

  clientData {
    name: "Group";
    type: "group";
    containers: [["body"]];
    contextMenu: @{
      <step id="loops" name="Number of Loops" class="flex-column"
        label="Configure how often the sequence should be repeated.">
        <h2 data-bind="html: step.label"></h2>
        <arc-slider params="
          value: parameter('nr_loops'),
          unit: '',
          initial: 3,
          fullValue: 100,
          step: step
        "/>
      </step>
    }@;
  }

  ...
} where {
  nr_loops: 3;
}
If you upload this bundle now, you have a looping group, which will repeat the sequence of apps as often as you have configured.
Multiple container - branching group
Next, we are going to create a group app with multiple branches. We are going to start from our simple, non-looping group with one container:
Group {
  port Success child("body").port("Success")
  port Error child("body").port("Error")

  clientData {
    name: "Group";
    type: "group";
    containers: [["body"]];
  }

  resultType {
    string error_cause;
  }

  --> body {
    port Success true
    port Error false

    resultType {
      string error_cause;
    }
  }
}
In order to add another container, we simply add a corresponding state and list
it in the containers list in clientData.
Group {
  port Success child("first").port("Success") or child("second").port("Success")
  port Error child("first").port("Error") or child("second").port("Error")

  clientData {
    name: "Group";
    type: "group";
    containers: [["first"], ["second"]];
  }

  resultType {
    string error_cause;
  }

  --> choose {
    port first true -> first
    port second false -> second
  }

  first {
    port Success true
    port Error false

    resultType {
      string error_cause;
    }
  }

  second {
    port Success true
    port Error false

    resultType {
      string error_cause;
    }
  }
}
Now we have created a two-container group with an initial switch state choosing which container will be executed.
We can also add a parameter to decide if the first or second container will be executed:
Group {
  port Success child("first").port("Success") or child("second").port("Success")
  port Error child("first").port("Error") or child("second").port("Error")

  clientData {
    name: "Group";
    type: "group";
    containers: [["first"], ["second"]];
    contextMenu: @{
      <step id="choose" name="Container" class="flex-column"
        label="Configure which container should be executed.">
        <h2 data-bind="html: step.label"></h2>
        <checkbox-slider params="
          value: parameter('first'),
          unchecked: 'Lower',
          checked: 'Upper',
          step: step
        "></checkbox-slider>
      </step>
    }@;
  }

  parameterType {
    bool first;
  }

  resultType { ... }

  --> choose {
    port first parameter -> first
    port second not parameter -> second

    parameterType bool

  } where parameter.first

  first { ... }

  second { ... }
} where {
  first: nil;
}
By switching the checkbox-slider, you can now control which sequence is executed.
Monitoring
So far we have created groups which (possibly) modify the execution behavior of the sequence of apps inside the group. Another way of utilizing the group concept would be to create a monitor group, which would make sure a desired condition always holds for all apps in the group.
This can simply be done by adding a monitor state in parallel to the body state containing the sequence of apps. So, starting with the finished Group from the first section - Simple Group:
Group {
  port Success child("body").port("Success")
  port Error child("body").port("Error")

  clientData { .. }

  resultType { .. }

  exit @{ .. }@

  --> body {
    port Success true
    port Error false

    resultType { .. }

    exit @{ .. }@
  }
}
We can now add a state monitor_part next to body and connect its port violated with the Error port of Group:
Group {
  port Success child("body").port("Success")
  port Error child("body").port("Error") or child("monitor_part").port("violated")

  clientData { .. }

  resultType { .. }

  exit @{ .. }@

  --> barrier run {
    -> monitor_part
    -> body
  }

  monitor_part {
    port violated service("gripper").event("gripper_state") ~= nil and
                  not service("gripper").event("gripper_state").is_grasped
  }

  action child("monitor_part").port("violated") @{
    setResult({error_cause = "Monitor triggered - Part lost."})
  }@

  body {
    port Success true
    port Error false

    resultType { .. }

    exit @{ .. }@
  }
}
Similar to this we could also connect the violated port to the Success port, if the execution should continue after the condition is reached.
Providing parameters to apps
Note
This topic is for advanced users and requires a deeper understanding of context menu development.
Lastly we want to have a look at providing parameters to apps. A group can register its own components, which can then be used in apps inside the group. If the component has the same name as a default component (see Parameter Modification), an app inside the group will initially choose the component provided by the closest parent. This way, a group can change the teaching behavior of any existing app, if it uses the provided components.
In order to modify the teaching behavior of an app we can, for example, create our own custom robot-pose component to replace teaching by a text input field. To do this, we need to create 3 different parts, the group, the template and the parameter writing logic.
Writing the group itself requires to register the components in clientData:
Group {
  port Success child("body").port("Success")
  port Error child("body").port("Error")

  clientData {
    name: "Group";
    type: "group";
    containers: [["body"]];
    components: @{
      <component name="robot-pose generated-robot-pose">
        <template src="group/robot_pose.html"></template>
        <script src="group/robot_pose.js"></script>
      </component>
    }@;
  }

  parameterType {
    []string input;
  }

  resultType { .. }

  exit @{ .. }@

  --> body {
    port Success true
    port Error false

    resultType { .. }

    exit @{ .. }@
  }
} where {
  input: [];
}
We name the component robot-pose to override the standard teaching flow. We need to specify the files containing the markup (i.e. template) and the script and give them a name, with which they can be used in apps. We also define the parameterType as list of strings, where the inputs in the text field will be stored.
Our file system structure will look like this for this kind of group:
.
└── bundles
  └── group
      ├── manifest.json
      ├── resources
      │   └── robot_pose.html
      │   └── robot_pose.js
      └── sources
         └── Group.lf
Next, we will write the code that translates these input strings into poses which can be used as parameters in the apps:
Group {
  port Success child("body").port("Success")
  port Error child("body").port("Error")

  clientData { .. }


  parameterType {
    []string input;
  }

  resultType { .. }

  --> prepare_poses {
    port done result ~= nil -> body

    parameterType []string

    resultType {
      []{
        [][]{
          [16]float pose;
          []float joint_angles;
        } relative_trajectories;
        {
          [16]float pose;
          []float joint_angles;
        } pose;
      } poses;
    }

    entry @{
      setResult(nil)
    }@

    action service("pose_provider").event("poses") ~= nil @{
      local res = {}
      res.poses = {}
      for i, p in pairs(parameter) do
        for k,v in pairs(service("pose_provider").event("poses")) do
          if k == p then
            res.poses[i] = {pose = {pose = v}}
          end
        end
        res.poses[i].pose.joint_angles = {}
        res.poses[i].relative_trajectories = {}
      end
      setResult(res)
    }@
  } where parameter.input

  body {
    port Success true
    port Error false

    parameterType {
      []{
        [][]{
          [16]float pose;
          []float joint_angles;
        } relative_trajectories;
        {
          [16]float pose;
          []float joint_angles;
        } pose;
      } poses;
    }
    resultType { .. }

    exit @{ .. }@
  } where {
    poses: child("prepare_poses").result.poses;
  }

  exit @{ .. }@
} where {
  input: [];
}
So, first we create a state to fetch poses. These could be calculated, requested via an operation call or, like in this example, taken from a service event. We then give these poses into the body state as parameter. We need to make sure, that the body state gets a list of a parameterType, which is equal to the desired parameter we want to configure (in this case, the poses).
Note that the service could also simply be replaced by a dictionary, which contains poses related to pose names, i.e. replace
entry @{
  setResult(nil)
}@

action service("pose_provider").event("poses") ~= nil @{
  local res = {}
  res.poses = {}
  for i, p in pairs(parameter) do
    for k,v in pairs(service("pose_provider").event("poses")) do
      if k == p then
        res.poses[i] = {pose = {pose = v}}
      end
    end
    res.poses[i].pose.joint_angles = {}
    res.poses[i].relative_trajectories = {}
  end
  setResult(res)
}@
with
entry @{
  local poses = {["aa"] = {1, 0, 0, 0, 0, 1, 0, 0, 0, 0, 1, 0, -0.2, 0.1, 0.1, 1},
                 ["bb"] = {1, 0, 0, 0, 0, 1, 0, 0, 0, 0, 1, 0, 0.1, 0.2, 0.4, 1}}
  local res = {}
  res.poses = {}
  for i, p in pairs(parameter) do
    for k,v in pairs(poses) do
      if k == p then
        res.poses[i] = {pose = {pose = v}}
      end
    end
    res.poses[i].pose.joint_angles = {}
    res.poses[i].relative_trajectories = {}
  end
  setResult(res)
}@
Since we now accumulate data in the group's parameter value for each taught app, we also add a garbage collection hook to clientData:
Group {
  port Success child("body").port("Success")
  port Error child("body").port("Error")

  clientData {
    name: "Group";
    type: "group";
    containers: [{ path: ["body"];
                   garbageCollect: { groupParameter: input;
                                     checkedContainerParameters: [poses];
                                   };
                }];
    components: @{
      <component name="robot-pose generated-robot-pose">
        <template src="input_group/robot_pose.html"></template>
        <script src="input_group/robot_pose.js"></script>
      </component>
    }@;
  }


  parameterType {
    []string input;
  }

  resultType { .. }

  --> prepare_poses {
    ...
  } where parameter.input

  body {
    ...
  } where {
    poses: child("prepare_poses").result.poses;
  }

  exit @{ .. }@
} where {
  input: [];
}
Hereby, we decide that our parameter input should be checked for references in the parameter value of the container state body in the parameter poses. So, if an app is removed from the group, this will make sure that the parameter value is also removed, if it is no longer used.
Next, we define the context menu. We start by defining the template, which for a simple text input field is simply:
<step id="input-pose">
  <input data-bind="
    value: pose
  ">
</step>
This is added to the file robot_pose.html which is placed in the resources directory of our bundle.
Now we just need to add the wiring logic. We need two distinct things to happen. Firstly, the string entered into the text field needs to end up in our groups parameter value. Secondly, the app needs to be parameterized, in this case with an access path into the containers parameter value, where we have put the actual pose values.
This can be done as follows:
var ko = require("knockout")
var _ = require("lodash")
var matrix = require("matrix")
var util = require("component_util")

function getParentAccess(targetPath, sourcePath, accessTail) {
  var numberOfParents = ko.unwrapDeep(targetPath).indices.length - ko.unwrapDeep(sourcePath).indices.length - 2
  return _.fill(Array(numberOfParents), "parent").concat(accessTail)
}

var RobotPose = module.exports = function(params, api, source) {
  if (!params.pose) {
    throw new Error("The parameter 'pose' is missing")
  } else if (!params.path) {
    throw new Error("The parameter 'path' is missing")
  }
  this.api = api
  this.source = source
  this.params = params
  this.pose = ko.pureComputed({
    read: function() {
      return this.config()
    },
    write: function(input) {
      var index = this.updateConfig(input)
      this.setTargetParameter(index)
    }
  }, this)
}

RobotPose.prototype.updateConfig = function(update) {
  var index = util.or(this.configIndex(), this.source.parameter("input")().length)
  this.source.parameter(["input", index])(update)
  return index
}

RobotPose.prototype.config = function() {
  return _.cloneDeep(this.source.parameter("input")()[this.configIndex()]) || ""
}

RobotPose.prototype.setTargetParameter = function(index) {
  var parentAccess = getParentAccess(this.params.path, this.source.path, ["parameter"])
  this.params.pose({ access: parentAccess.concat(["poses", index + 1, "pose"]) })
}

RobotPose.prototype.configIndex = function() {
  var access = getParentAccess(this.params.path, this.source.path, ["parameter", "input"])
  return this.params.pose() && this.params.pose().access[access.length] - 1
}
Here we can see that two things happen on write for the pose: First, the config is updated. This means, that the string entered into the text field is written into the parameter of the group. Next, the target parameter is written. The target parameter refers to the actual parameterization of the app. So inside the apps context menu we write the access path into the body. Note, that the index into the list of poses is the same as the index of the string in the groups parameter value. So, if we parameterize this, the resulting state machine would look like this:
Note
This is the automatically generated code for the task and does NOT need to be implemented.
task {
  port Success child("body").port("Success")
  port Error child("body").port("Error")

  exit @{ .. }@

  --> body {
    port Success child("group").port("Success")
    port Error child("group").port("Error") or false

    exit @{ .. }@

    --> input_group {
      port Success child("body").port("Success")
      port Error child("body").port("Error")

      exit @{ .. }@

      body {
        port Success child("pick").port("Success")
        port Error child("pick").port("Error") or false

        exit @{ .. }@

        --> pick {
          ...
        } where {
          approach : [parameter.poses[1].pose];
          pick_pose : parameter.poses[2].pose;
        }

        parameterType { .. }
        resultType { .. }
      } where {
        poses : child("prepare_poses").result.poses;
      }

      --> prepare_poses {
        ...
      } where parameter.input

      parameterType {
        []string input;
      }
      resultType { .. }
    } where {
      input : ["aa", "bb"];
    }

    parameterType { .. }
    resultType {
      string error_cause;
    }
  } where {
    poses : parameter.poses;
  }

} where {
  poses : [];
  speed : 0.5;
}
Here we can see nicely that the strings "aa" and "bb" have been entered into the groups parameter value. The pick app, which is the app we parameterized, has the access paths into the parameter of body with approach going to parameter.poses[1].pose and the actual pick pose to parameter.poses[2].pose.
Dynamic Linking
The main idea of dynamic linking is to have higher-order state machines, i.e. state machines that take one or more state machines as arguments, and to use the passed state machines in links, i.e. dynamically link to them.
Consider a simple example, where we want to say hello to someone. Instead of hardcoding the name, we want a state machine to provide the name. This way we could have different strategies for getting the name like returning a hardcoded value, or retrieving the name from a service.
Defining a state interface
First we need to define the type of the state machine that provides the name. The type of a state machine is also called state interface. It could look like this:
{
  port done
  resultType string
}
We need a port to know when the state machine is finished. The result is simply a string and will contain the name of the person we want to say hello to.
Creating a dynamic link
Now we can implement the state machine say_hello_to:
say_hello_to {
  port done child("say_hello").port("done")

  parameterType {
    {
      port done
      resultType string
    } get_name_state;
  }

  --> get_name <- parameter.get_name_state {
    port done -> say_hello
  }

  say_hello {
    port done true

    parameterType string

    entry @{
      printf("Hello %1!", parameter)
    }@
  } where child("get_name").result
}
Note that the type of the parameter field get_name_state is exactly the state interface we defined above.
In the first state get_name we dynamically link to the given state machine.
As soon as the linked state finishes we execute the actual logic in child state say_hello, namely saying hello to the returned name.
Creating a state reference
As a next step we need some state machines that fulfill our state interface above. To keep it simple we return some hardcoded values, e.g.:
get_name_jane {
  port done result ~= nil
  resultType string
  entry @{
    setResult("Jane Doe")
  }@
}
and
get_name_bob {
  port done result ~= nil
  resultType string
  entry @{
    setResult("Bob Smith")
  }@
}
Using say_hello_to, i.e. linking to it, could be done like this:
say_hello_to_everyone {
  port done child("say_hello_to_bob").port("done")

  --> say_hello_to_jane <- say_hello_to {
    port done -> say_hello_to_bob
  } where {
    get_name_state: {
      state: "get_name_jane";
      parameter: {};
    };
  }

  say_hello_to_bob <- say_hello_to {
  } where {
    get_name_state: {
      state: "get_name_bob";
      parameter: {};
    };
  }
}
Executing say_hello_to_everyone with ride log running in parallel prints
$ ride log
[ INFO] 10:48:49.755 UTC: Hello Jane Doe!
[ INFO] 10:48:49.759 UTC: Hello Bob Smith!
Using an anonymous state
Since creating root states for every state reference can be quite cumbersome, Lingua Franka also supports anonymous states. We can rewrite say_hello_to_everyone, without separate root states:
say_hello_to_everyone {
  port done child("say_hello_to_bob").port("done")

  --> say_hello_to_jane <- say_hello_to {
    port done -> say_hello_to_bob
  } where {
    get_name_state: {
      port done result ~= nil
      resultType string
      entry @{
        setResult("Jane Doe")
      }@
    };
  }

  say_hello_to_bob <- say_hello_to {
  } where {
    get_name_state: {
      port done result ~= nil
      resultType string
      entry @{
        setResult("Bob Smith")
      }@
    };
  }
}
Setting state references via Lua scripts
It is also possible to set state references via Lua scripts. We modify the context menu of say_hello_to_app, so that it provides only a name. This name is then used in the entry script to create a corresponding state machine reference:
say_hello_to_app_2 {
  port Success child("say_hello").port("done")
  port Error false

  clientData {
    type: "app";
    name: "Say Hello 2";
    contextMenu: @{
      <step id="name" name="Say hello to" class="flex-column">
        <drop-down-menu params="
          parameter: parameter('name'),
          default: 'jane',
          items: [ {value: 'jane', text: 'Jane Doe'},
                   {value: 'bob', text: 'Bob Smith'},
                 ],
          step: step
        "></drop-down-menu>
      </step>
    }@;
  }

  parameterType {
    string name;
  }

  variableType {
    {
      port done
      resultType string
    } get_name_state;
  }

  resultType {
    string error_cause;
  }

  entry @{
    setVariable({
      get_name_state = {
        state = "get_name_" .. parameter.name,
        parameter = {}
      }
    })
  }@

  --> get_name <- variable.get_name_state {
    port done -> say_hello
  }

  say_hello {
    port done true

    parameterType string

    entry @{
      printf("Hello %1!", parameter)
    }@
  } where child("get_name").result
} where {
  get_name_state: nil;
}